If you own an electric scooter, you know how convenient and fun it is to ride around the city. But you also know that your electric scooter needs some regular maintenance and care to keep it in good shape.
One of the most crucial components of your electric scooter is the motor, which is responsible for turning the electricity into motion. But how can you tell if your motor is functioning well? And what should you do if you encounter any issues with it?
In this blog post, we will teach you how to test electric scooter motor using some basic tools and techniques. You will learn how to measure the voltage, resistance, and current of your motor, and how to identify and fix some common problems.
By following this guide, you will be able to ensure that your electric scooter performs optimally and safely.
- Also Read: How to Ship an E-Scooter
- Also Read: How Much Do E-Scooters Weigh
- Also Read: Guide to Start E-Scooer Rental Business
- Also Read: Lifespan of E-Scooters
Understanding Electric Scooter Motors
The part of an electric scooter that makes the wheels move is called an electric scooter motor. It changes electrical energy from the battery into mechanical energy.
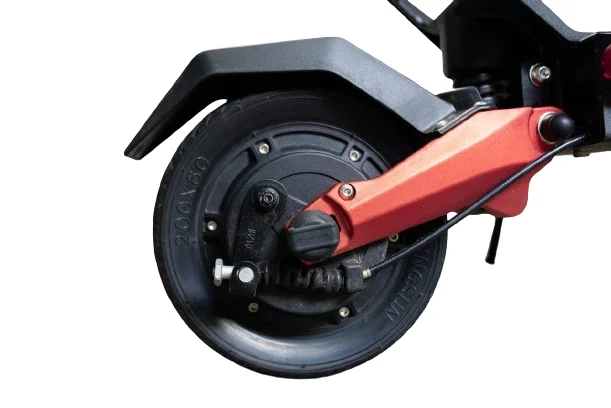
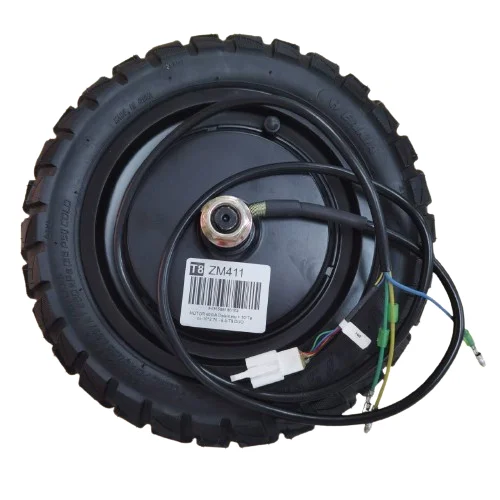
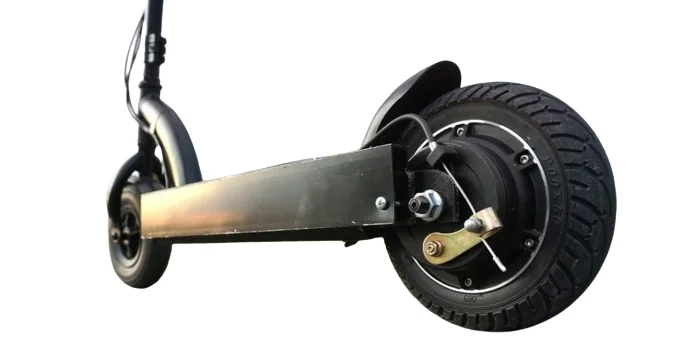
Most electric scooter motors are brushless DC motors, which are made to be small, light, and efficient. They can be inside the wheels (hub motors) or near the back wheel (chain-driven motors).
The battery gives the motor direct current (DC) electricity. The motor uses this electricity to make a magnetic field, which makes the motor’s rotor spin. The spinning rotor makes the wheels turn, which makes the scooter go.
The motor’s voltage and wattage decide how fast and powerful it is. Motors with higher voltage and wattage can go faster and stronger, but they also use more battery energy.
The motor’s size also matters, because bigger motors usually have more torque and power.

How to Test Electric Scooter Motor?
To make sure your electric scooter motor works well and does not have any problems, you need to test it regularly. Follow these steps to test your electric scooter motor:
Safety: A Top Priority
Before you begin any testing, ensure that your electric scooter is not connected to the power source or the charger. Use rubber gloves and tools with insulation to protect yourself from electric shocks.
Getting Ready: Gathering the Tools and Equipment
You need to have the right tools and equipment ready before you start testing your electric scooter motor. Some of the things you might need are a multimeter, screwdrivers, safety goggles, and gloves.
Learn About the Parts of Your E-Scooter
Before you start testing, look over your scooter’s manual and learn about the parts of the motor and control system. This will make it easier for you to follow the testing steps and fix any problems that may occur.
Disconnect the E-Scooter Motor From the Control Unit
To test the motor, you need to disconnect it from the control unit first. Check your scooter’s manual for the proper way to do this without causing any damage.
Inspect for Signs of Damage
Look for any visible damage on the motor and its connections, like wires that are torn or rusted. Inspect for signs of any physical damage on the motor’s surface, such as loose parts, cracks, or dents.
You need to fix these problems before you test the motor further. These damages may not be obvious, but they could impair the motor’s function.
Use a Multimeter to Measure the Resistance
You need to measure the resistance (ohms) of the motor with your multimeter. Attach the probes to the terminals of the motor (see your manual for how to find the terminals).
The reading should match the range in the manual. If it doesn’t, the motor might be broken and need to be fixed or replaced.
A good motor will have a low resistance value (0-5 ohms). The motor may be faulty if the resistance is very high or there is no connection between windings.
Check the Motor’s Continuity
You need to check the motor’s continuity with your multimeter. Put it on the lowest resistance setting (usually 200 ohms) and touch one probe to a motor terminal and the other to the motor casing.
If the multimeter gives a reading, it means the motor has a short circuit inside, which might need expert repairs or replacement.
Check the Motor’s Voltage Output
After you connect the motor to the control unit, switch on your scooter. Check the voltage output at the terminals of the motor with your multimeter when it is running.
The reading should match the range in the manual. If it doesn’t, you may need to service the motor or control unit.
The voltage value should go up as the scooter goes faster. The motor or the controller may have a problem if the voltage is fixed or there is no voltage value.
Ensure That No Connections are Loose
Check the cables that link the controller and the electric scooter motor. Make sure they are fastened and connected correctly. The motor may malfunction or stop working if the wiring is loose or damaged.
Check the Hall Sensors
To find out where the rotor is, the motor has Hall sensors inside it. You need a multimeter to measure the Hall sensor’s power supply voltage. Then, look at the manufacturer’s specifications and see if your readings match them. They should be in the same range.
Use a Temporary Battery to Test the Motor
You need to do this step to find out if the problem is with the motor or the battery of the scooter. Attach a different battery with the same voltage to the motor and start the scooter. If the motor works well, then your scooter’s battery may be the problem.
Get Assistance From a Skilled Professional
Don’t try to fix the electric scooter motor problem on your own if you don’t know how to do it. Get help from a skilled technician or the company that made the electric scooter. They can repair or replace it for you.
Hub Motors in Electric Scooters

Most e-scooters have a hub motor or an electric motor that is integrated into the middle of either the front or rear wheel, which does not affect the original design of your device.
Since the hub motor is attached to the wheel it drives, it can move that wheel very efficiently. They are easy to install and access for maintenance and repair.
When you turn off your electric scooter to switch to manual mode, the hub works like a normal wheel hub that connects the tire, rim, and spokes to the axle.
To prevent electric scooter motors from malfunctioning, you need to regularly maintain your device.
Hub motors have some drawbacks too. For one, they add extra weight to the wheel they power. And because they require more wiring to supply electricity, adjusting the wheel and changing tires can be challenging.
Therefore, you will need to properly maintain your device if it has a hub motor or face electric scooter motor problems.
Types of Motor
Main two types of motors are used in electric scooters:
Brushless DC Motors
Brushless DC motors, also known as BLDC or EC motors, are based on newer technology that performs better than brushed DC motors.
Developed in the 1970s, BLDC motors are efficient, have higher power-to-weight ratios, and are more durable.
They also tend to run quieter and are less prone to overheating. Most quality electric scooters will have a BLDC motor.
Brushed DC Motors
Brushed motors are an older type of motor technology dating back to the 1800s. Over time, the brushes wear down from friction and that can cause electricity to behave unpredictably and be hazardous.
In a BLDC motor, this mechanical component is replaced by electronic switching circuitry that alternately powers different coils in the motor.
How Do Electric Scooter Motors Work?

Electric scooter motors are designed for electric scooters, as the name suggests. Sometimes, core motors are also used for this purpose.
To ensure the integrity of the design and the reliability and efficiency of the e-scooter, the electric motors or hubs are usually attached to the front or back wheel of the e-scooter.
The e-scooter motor powers the wheels through a shaft, which makes the electric scooter move.
The core motor provides power to the wheel automatically, but it requires maintenance occasionally. Otherwise, it could cause the electric scooter motor to malfunction or stop working.
There are different kinds of core motors with various designs and shapes. Some of the common ones are:
Brushed Motors
They are tough and strong and can handle heavier loads. They are, however, slightly less powerful.
Brushless motors are, in contrast, more dominant and also have fewer moving parts. The only problem is they are weak and incapable of dealing with adverse road conditions.
Geared Center Motors
They are relatively smaller in size and provide more range but with less power. Gearless motors, however, are huge and powerful, giving more power and torque to the electric scooter.
How to Troubleshoot Your Electric Scooter Motor?
You spent a few minutes trying to figure out why your electric scooter motor is not running. You attempt to solve whatever problem you notice or can imagine, but you have no clue what is wrong with the motor.
Here are some possible solutions for a non-working electric scooter motor.
Inspect the Motor
Inspect for any loose or disconnected wires and cable connectors. Gently tighten every wire and cable connector so they won’t break or move. Check all wires or cable connectors that connect to the motor.
See anything that looks burnt or melted? If yes, this means the motor overheated. When overheated, the motor could have caused the insulation to melt off the electromagnetic wire coil.
Electric scooter motor not working? Smell the motor, speed controller, and other electrical components. Do you smell something like burnt plastic or rubber?
If you do, the coils must have overheated, and there might be damage to the speed controller.
If the plastic insulation melts off the magnetic coil, they will short circuit and cause the electric scooter motor to stop working. Replace the motor as soon as possible.
Check the Battery and Charger
The battery provides the power to start and run the e-scooter motor. If the motor is not working, check the battery. Is it in good condition? Do you perform stunts or ride aggressively?
Do you ride on wet or rough terrain? Exposure to the elements and stress from riding can damage your e-scooter battery and cause the motor to malfunction.
Check your charger too. Is it working? Plug it into an outlet and see if any indicator light is on.
If the light is off or flickering, the charger is defective. You can also measure the charger’s output voltage with a multimeter.
The output voltage should be a few volts higher than its rated voltage (24V, 36V, or 48V). If the output voltage is zero or lower than the rated voltage, then the charger is defective. A faulty charger can prevent the motor from running.
Conclusion
Testing your electric scooter motor is a simple and effective way to ensure your scooter’s performance and safety.
By following the steps outlined in this guide, you can easily check for any issues with the motor and its connections, such as damage, short circuits, or voltage problems.
You will need some basic tools and equipment, such as a multimeter, screwdrivers, and gloves, as well as your scooter’s manual for reference.
Remember to disconnect the motor from the control unit before testing and reconnect it afterwards. By regularly testing and maintaining your electric scooter motor, you can enjoy a smooth and hassle-free ride.